You take control of a five member SWAT team, barging into an office building overrun by terrorists. Make your way through eight floors, rescuing hostages and gunning down the enemy in turn-based RPG battles! Sounds awesome, right? Well, before you get too excited, read on!
This is famously one of the most buggy games ever released in Japan. The goal to pass each level is to kill all of the enemies on the floor, then you use your communication device to tell your backup to rush in and clear out the hostages. But almost always, the game will say "Wait! There are still more enemies on the floor!" even when there are not! It's infinitely frustrating, and there's nothing you can do but to reset the game and hope that this glitch won't happen next time. It may take you five tries or more to finally have a playthrough of a level where this glitch doesn't happen. And this is going to happen on every level...
It gets worse. If you finally avoid the level end glitch, you will get a password. But there is an excellent chance that this password won't work. So just imagine finally beating a level after 7 tries, getting a false password, playing the next level until all the enemies are dead, but the game says there are still more when there are not, so you have to reset. Then you find your password doesn't work, so you have to start over on the previous level again! The password glitch can be avoided with an emulator. Specifically what happens is that the correct password is shown for one frame, and then some of the characters toward the middle get overwritten by your character's name. It's impossible to get the unaltered password without slowing the emulation speed down like crazy and taking a screen shot at the precise moment the first frame is shown, or record a video and replay it later so you can pause it. Either way, you'll want to use save states to prevent missing the password.
There are more glitches too! Occasionally (luckily it's not that often) the game will just freeze. On the first level, there is a battle that might infinitely loop (you kill an enemy, then he appears to attack you again infinite times), forcing you to have to reset. There are weird, harmless glitches too, like the screen might suddenly become tinted blue, and there are multiple spots on the final level where you'll get attacked by zero enemies (you go to the battle screen and no one's there, so the battle immediately ends).
Beyond the glitches, many features in the game simply don't work. For example, when you enter a room, you have the option to simply enter, or to toss a smoke bomb inside the door first, or to throw a grenade through the door first. Tossing the smoke bomb or grenade doesn't do anything.
So here's the deal. This FAQ will explain how the game is supposed to work, then explain how it actually works. I will provide the passwords for each level so you can move on to the next one when the game refuses to let you via its glitch. You are going to have trouble seeing the ending since the game is unlikely to allow you to pass the final level due to the enemy glitch, so you'll most likely have to beat the last level several times (and it's pretty hard).
The game is only in Japanese, but this FAQ should help you understand the game without Japanese knowledge.
Characters
Your SWAT team is composed of the following five members:
You
Position: Commanding Officer (たいちょう).
Ethnicity: German.
Description: An expert in guerrilla warfare.
Harris (はりす)
Position: Vice Commanding Officer (ふくたいちょう).
Ethnicity: Irish.
Description: Calm under pressure.

Sakata (さかた)
Position: Group Member 1 (たいいん1).
Ethnicity: Japanese-descended Hawaiian.
Description: Expert in martial arts.
Lionel (らいおねる)
Position: Group Member 2 (たいいん2).
Ethnicity: African-American.
Description: A jokester that's good at the saxophone (this racist description comes directly from the manual).

Max (まっくす)
Position: Group Member 3 (たいいん3).
Ethnicity: Slavic.
Description: Explosives expert and 4-th dan blackbelt in Judo.
Getting Started
The title screen is in English, so that's convenient:
START - Begin a new game.
CONTINUE - Enter a password to start at a later level.
If you choose START, you will have to enter your name. If you choose to CONTINUE, you will have to enter a password, and then enter your name afterwards. When entering your name after using a password, it is OK to use any name you like (it's not one of those games where the password is dependent on your character's name).
While entering your name or password, you will be presented with the Japanese "alphabet" and the additional menu options:
すすむ - "Go Forward". Move ahead one space.
もどる - "Go Back". Go back one space.
けずる - "Erase". Delete the highlighted symbol and move back one space.
おわる - "End". Finished entering the name/password.
If you are starting a new game, you will be asked to choose which entrance you want to enter the building from. Skip ahead to the "Walkthrough" section of this FAQ to get a detailed description.
How To Play
Map Features
While walking around the floors, there are a few things worthy of note other than the enemies that will be explained here. There are a lot of doors that you cannot enter and are just for decoration. So to keep you from getting frustrated about trying to figure out how to open them, I'll list them below so you don't waste your time.
Doors: To open a door, choose the あける ("Open") command while facing the door. You will see a list of options: とつにゅう ("Rush In"), えんまく ("Smoke Screen"), and HB ("Heavy Bomb"). It doesn't seem to matter what you choose, so I presume this is a feature that was never finished before the release of the game. Each command simply gets you past the door.
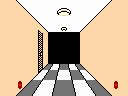
Traps: You will see many locations within each floor that have two red circular spots on the wall that represent a trap. If you enter the trap, it is possible that the enemy will be attracted to your location (an alarm trap). Since your goal is to kill all the enemies, this is not necessarily a bad thing. However, in general, the traps don't really seem to have any effect. To disarm a trap, while facing it select the はずす ("Remove") option, then select わな ("Trap"). Afterward, you have to press "B" to exit the menu, or else it will keep telling you "There is no trap" if you continue to press "A".
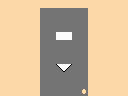
No Lights: In some areas, the lights will be out. At these times, you can't see doors if you face them directly. However, you will be able to see them if you back up or face a different direction, as shown in the image above. There appears to be no other effect of having the lights out. You can see like normal if you find the night vision goggles.
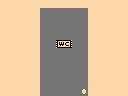
Bathroom: There are two bathrooms next to each other on each floor. You cannot enter them.
Elevator: There are elevators on each floor. You cannot enter these either.
Stairs: These are supposedly stairs. You cannot go up/down them.
Fire Exit: This door represents the fire exit, but you cannot go through this door.
Enemy Encounters
Your goal is to defeat all of the enemies. There are two types of enemies: 1) Enemies that walk around the map, and 2) Enemies that stay in place. The groups of enemies that stay in place are often guarding hostages (but not always).
You can use the きく ("Listen") command to see if there is an enemy nearby. If an enemy is not nearby, you will see the phrase:
あやしい ものおとは なにも きこえません
"You don't hear anything suspicious"
If an enemy is nearby, you will see the phrase:
ぜんぽうの ろうかから あしおとが きこえます
"You can hear footsteps in the corridor ahead of you"
This listening tactic isn't very helpful since you aren't trying to avoid the enemies, so you might as well just rush forward.
Often, when you find an enemy, he will have his back toward you. You might think that this is an opportunity to use a sneak attack and strangle or knife the guy from behind, but this almost never seems to work for me. It's still best just to shoot him like normal. Your hit percent does seem to be a little higher in these situations, at least.
Hostages
Each floor has a certain number of hostages you can rescue. Rescuing hostages doesn't affect anything important in the game, but the game does keep track of how many hostages you rescued at the end, so you can consider it to be your score.
Hostages can be found in two ways:
1) Guarded by terrorists. After a terrorist battle, you will be taken to a menu screen where you can talk to the hostages (if there are any) and terrorists. Go to the "Battle Aftermath Menu" section for a description.
2) Hidden on the map. Some hostages can be found by using the みまわす ("Look Around") command at certain locations. If used at the correct location, you will find a hostage and hear a brief dialogue.
Time Limit
You have to beat the game within 24 hours. A timer ticks down in the lower-right corner of the screen to show you how much time you have left. It is also ticking down during battles (although not shown) and while you interact with the menu commands. You can press "START" to pause the game at pretty much any time and the timer will stop ticking for that time. The timer ticks down in real time, so you actually have 24 hours of your real time to beat this game, which is a ton, so relax.
Items
くすり - "Medicine". Use outside of battle to cure an ally by 10-19 HP. Use during battle to cure an ally by 5-10 HP. Can be used infinite times.
つうしんき - "Communications Device". Use after all enemies have been cleared from the floor to move on to the next level.
ろっかーのかぎ - "Locker Key". Can be found on a particular floor and allows you to open lockers.
あんしきょう - "Night Vision Goggles". Found on a particular floor. Allows you to see in the dark.
Weapons
Your party comes equipped with a few different kinds of weapons. You can change who is carrying which weapon (see the "Walking Menu" section for details), although it doesn't seem to make a difference. You never gain any new weapons, and you have infinite ammo for each weapon (except for the bombs).
SMG - "Sub-Machine Gun". Shoots four bullets per turn during battle. You have three of these, equipped by yourself, Harris, and Sakata.
RF - "Rifle". Shoots one bullet per done and does heavy damage. You have one, equipped by Lionel.
HG - "Hand Gun". Shoots one bullet per turn. Each character comes equipped with one.
Gas.HB - "Gas and Heavy Bomb". The person equipped with these will get three special bomb attacks during battle, which can only be used a limited amount of times. The Sleep Gas (さいみん) can disable one or more enemies instantly, which is pretty awesome, but can only be used 5 times during the entire course of the game, so save them for the last level. The Smoke Screen (えんまく) attack will fill the room with smoke, reducing the hit percent of both sides (a pretty useless attack) and can only be used 3 times. The Heavy Bomb (HB) can be used during battle to deal heavy damage to one character, but is likely to hit one of your own party members, killing him instantly, so best saved for a desperate situation. You can only use the HB 3 times. Max comes equipped with these bombs.
Battles
Battles are different than in your typical RPG. You tell each of your characters what action to take out of a fairly large list of options. The options include shooting with either gun the character is equipped with, rushing forward with a knife or wire, sneaking up on the enemy and using a knife or wire, and several others. However, the programming in the game was so lazy and unfinished that it seems that the only option that is of much use is the regular shoot command. An exception is the bombs that one character can use, which can be helpful, but are limited in supply.
Enemy Damage
After choosing an attack method, you will need to choose which enemy to aim for and which part of his body to aim at. You can aim for the following body parts:
どうたい - "Torso".
あたま - "Head".
うで - "Arm"
It's almost always best to aim for the arm. After an enemy has taken 20 HP to the arm (which is not very much), he will be disabled. You will be able to interrogate him after the battle as an added bonus. It takes 100 HP to kill an enemy if you aim for the head or torso. However, after 80 HP damage, he will collapse and be unable to fight, allowing you to interrogate him when the battle has ended. There isn't much benefit to interrogating the enemies, so blast them in the face if you find it to be more satisfying, but aiming for the arm is the best strategy since it's faster (only 20 HP damage needed), and you miss so fricking much in this game that you won't have the patience to wait to deal 80 HP damage very often.
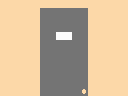
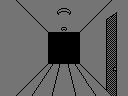
When you've disabled the enemy by some means (20 HP damage to arm, 80 HP to the head, or hit by a Sleep Bomb), they will be disabled. This is represented by the enemy graphic changing to a graphic of him flying back, like the enemy shown in the screenshot to the right (the enemy on the right).
Ally Damage
You own characters will die if their HP goes to zero. They have 100 HP maximum, and can be healed outside of battle by using the くすり ("Medicine") item, which can be used infinite times. You can also heal during battle, but the amount is pretty small (5-10 HP) and can only be done by one character per turn. When one of your characters is damaged, you will see some text after the HP amount indicating how hurt they are:
けいしょうを おった - "Minor damage". Character has 51-79 HP remaining.
じゅうしょうを おった - "Seriously injured". Character has 21-50 HP remaining.
じゅうたいに おちいった - "Collapsed seriously injured". Character has 20 HP or less remaining.
しんだ - "Died". Dead characters cannot be revived, by the way.
Stray Bullets
You told your characters what body part to aim for on the enemy. However, there is a random chance that your character will accidentally hit the enemy on a different body part. This is often advantageous since the damage could be 100 HP to the head and such. But if there are hostages in the room, you might randomly hit them as well. If you hit a hostage, they might die (they have around 30 HP). It's not a huge deal since you can finish the game just as easily. But if you were trying to rescue all the hostages, then it could bother you.
If an enemy is disabled (by being shot for more than 20 HP in the arm, or more than 80 HP in the head/torso), but is not dead, your other characters will continue shooting at him if you told them to.
If you disabled or killed all of the enemies in the battle, one of your characters will attack one extra time. I guess this signifies the fact that there is a delay between shooting all the enemies down and your characters realizing the fight is over. The result is that there is an extra opportunity for you to accidentally hit a hostage with a stray bullet.
If you have trouble following along with the Japanese text, then you can check to make sure all the hostages are still alive by talking to them after the battle (if you care about killing them, that is). If they are dead, they won't talk.
Finishing A Level
When you think you've killed all the enemies on the floor, use your Communications Device to inform your backup, using the commands つかう ("Use") and つうしんき ("Communications Device"). If you have killed all of the enemies, then you will get a password (that might not work, remember, so use a save state instead if you're using an emulator).
If you have not killed all of the enemies, you will instead see the message:
いや まて! まだ てきが のこっているようだ
"No, wait! There are still enemies remaining."
Even if you kill all of the enemies, a bug in the game may keep the computer thinking that more enemies remain when they don't. In that case, you'll keep seeing the message shown above and you won't ever be able to pass the level. So you'll have to reset the game.
Menus
Walking Menu
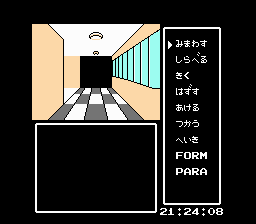
While walking around the map, you will see the menu options shown in the image to the right. An explanation of each command is given below.
みまわす - "Look Around". Use this command to find hidden hostages at specific locations of a map. If you find one, you will be taken to the "Battle Aftermath Menu", explained in a section below.
しらべる - "Search". This command is used to check for traps in front of you. Since you can always see the traps, this is a completely useless command.
きく - "Listen". Use to listen for nearby enemies.
はずす - "Remove". Use to disarm traps in front of you by selecting わな ("Trap"). Can also be used to remove the Night Vision Goggles (あんしきょう) from your face if you have them.
あける - "Open". Used to open doors. You will be given a submenu of useless commands, so just pick one and proceed.
つかう - "Use". Use an item.
へいき - "Weapons". Use to rearrange who is equipped with which weapon. You will have to choose which weapon to give to which character in the following order: You, Harris, Sakata, Lionel, and Max.
FORM - You can rearrange the formation of your team. There is a 5x5 grid you can place each team member on. The letters F, B, L, and R represent forward, backward, left, and right. You move the letter T around, representing your main character, and press "A" to set him in a position. Then you continue setting all of your characters in the order: You, Harris, Sakata, Lionel, Max. I don't know if this feature was ever finished. I only found it to cause problems when I tried to use it, so I recommend using the default formation. The problem I noticed was that enemies would start getting the first attack (normally you get to attack first) by moving my characters to the front row. I was hoping I might increase my hit rate, but it did not.
PARA - Check the "parameters" (stats) of your characters. Choose a character (listed by their position, not their name). You will see a window that shows their name and position, their HP, AP, what weapon is equipped, and what items they hold. The items are meaningless since all the characters have the same access to each item. The AP stat also appears to have no purpose. It scales with your HP, so you can just think of it as a second HP listing.
Battle Menu
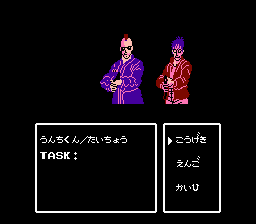
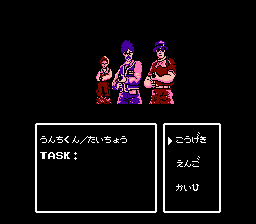
During battle, you have to set the actions for each of your five characters, in the order of yourself, Harris, Sakata, Lionel, and Max. To the right is shown the first screen of the battle menu. The current player whose actions you are setting is shown in the top line (my character's name is うんちくん - "Mr. Poop"). Below his name will be shown a summary of the "task" that you have assigned to this player.
Your first options are:
こうげき - "Attack"
えんご - "Cover Fire"
かいひ - "Evade"
Press "B" to see more menu options:
ちりょう - "Medical Treatment"
PARA - "Parameters". View this character's stats.
とうぼう - "Escape"
Each command option is explained in detail below.
Attack:
Brings up the options:
せっきん - "Approach". Choose between とつげき ("Assault") and しのびより ("Sneak Attack"), then choose to attack with the KF ("Knife") or WIR ("Wire").
しゃげき - "Shoot". Choose which weapon to use (depends on the character).
とくしゅ - "Special". Only the character equipped with the GAS.HB can use this command. Brings up the options さいみん ("Hypnotize"), えんまく ("Smoke Screen"), and HB ("Heavy Bomb"), described in the "Weapons" section of this FAQ. These commands are all executed without giving you the choice of an enemy to target.
After choosing a set of options, you will have to choose an enemy to target (unless you're using a bomb). The enemies are referred to by numbers. The enemy farthest to the left is number 1. Even if an enemy is killed and removed from the screen, all the other enemies will still be referred to by the same number that they were at the beginning of the battle.
Next, choose a body part to aim at on the targeted enemy. The options are どうたい ("Torso"), あたま ("Head"), and うで ("Arm").
Finally, you will be asked to confirm your command settings. Refer to the left side of the window to see what you entered. Choose GOOD to keep this command, or choose N.G ("Not Good") to redo this character's command. After choosing GOOD, there is no way to change the command on this character once you've moved on to the next one.
Cover Fire:
Similar to the Attack -> Shoot option above. Choose a weapon to attack with, an enemy to aim at, and a body part to aim for. Then choose GOOD to confirm your action (or N.G to redo). I'm not sure that this command is actually different than the Attack->Shoot command in any way, although it seems to me that your hit percentage is reduced, making this a poor option. Stick with the Attack -> Shoot command as it worked well for me.
Evade:
After choosing this, simply choose GOOD to confirm (or N.G to redo). You would think that this would reduce the hit percent on the character you used it on, but it didn't seem to make my characters avoid the enemy very well at all. Give it a try if one of your characters is hugely injured though since maybe it really does help.
Medical Treatment:
Only one character can use this command per round of battle. It seems a bit buggy. After choosing this, there are two options: うける ("Receive"), おこなう ("Perform"). It doesn't matter which one you choose. Then you'll see the list of characters to choose from to heal. After choosing one, if it shows the GOOD/N.G options, then choose GOOD to perform the treatment. But if it doesn't show the GOOD/N.G option, then it won't let you use the command for some reason (buggy). You can try it with the うける option or the おこなう option and sometimes one will work but the other won't.
If you manage to get it to work, it will heal the chosen ally by 5-10 HP. Not great, but an option to keep in mind nonetheless.
Parameters:
Simply shows the stat summary screen for your current character, so you can check his HP. This does not take your turn.
Escape:
Only the main character can use this option. Attempt to escape from the battle. If you fail, the enemy will get a free turn to attack.
Battle Aftermath Menu
After winning a battle, you will be taken to a screen with the following options:
はなす - "Speak".
じんもん - "Interrogate".
The "Speak" option is for speaking to hostages. If there are no hostages present, a message will say so and nothing will happen. The "Interrogate" option is for speaking to the terrorists.
If you choose "Speak", you will see a list of numbers to choose from which represent the hostages. Choose a number and the corresponding hostage will say a short piece of dialogue, unless that hostage is dead due to stray bullets. Usually it's something like, "I'm saved!". Occasionally it's something like, "They took the company president to the 8th floor" or some such message that sounds important, but doesn't really give you any help. So usually there's really not much to gain from these dialogues. Press "B" to return back to the previous menu.
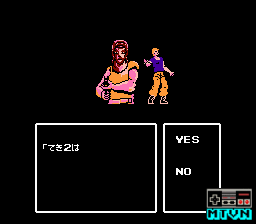
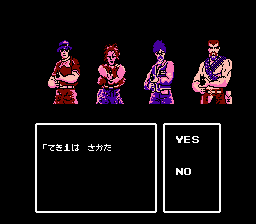
If you choose "Interrogate", you will see a list of numbers representing the terrorists. Select a number to begin interrogating the corresponding terrorist, unless the terrorist is dead, in which case you cannot select that number. After selecting a terrorist, you are asked if you want to use "emergency measures", meaning torture basically. If you choose NO, you will see a short piece of dialogue which might just be "...". If you choose YES, you will have the options:
なぐる - "Strike"
WIR - "Wire". Strangulation, in other words.
じはくざい - "Truth Serum"
For each terrorist, there is a particular option above that they will respond to. If you select the wrong one, you'll see some unhelpful text, like "...". If you select the right one, the text will be different, but it's not very helpful usually either in reality. You can keep selecting all the options until you get the one that the terrorist responds to, but in reality this interrogation process is an unnecessary waste of time.
After you're done interrogating and speaking to hostages, press "B". You'll be asked if you want to leave this menu screen, so select YES to exit.
Walkthrough
Floor 1
When you begin a new game, you will be asked which entrance you want to use to enter the terrorist-occupied building. The options are:
しょうめんげんかん - "Front Entrance"
ひじょうぐち - "Emergency Exit"
つうようぐち - "Side Entrance"
Ultimately, it doesn't matter which option you choose. You will start at a different location on the first floor. You will be immediately attacked if you enter through the front entrance, but the goal is to defeat all the terrorists, so this is not a bad thing. I had the most luck avoiding game glitches on the first floor by entering through the front entrance. The downside is you won't have the opportunity to heal for several battles in a row (four) since they'll happen in rapid succession, but they're all easy except for the first battle, which is only "hard" because the enemies get to attack first (but this is the only battle in the game where this is true).
During battle, always choose the option こうげき ("Attack"), then しゃげき ("Shoot"). Always aim for the enemies' arms (うで) since this will debilitate them quickly. You miss a lot in this game, so you'll have to have patience. Distribute your SMG attacks among the enemies since they spray more bullets, giving you a good chance to hit the enemies. So, for example, if you're attacked by three enemies, have your three SMG wielding members (you, Harris, and Sakata) each aim at a different enemy. Lionel's rifle is the best weapon for dealing heavy damage, so use him to hit enemies that are proving harder to kill. Max has the excellent bomb arsenal, but since you need to conserve it, his HG attack is all he really has, which is pretty mediocre. There's no reason to ever use the HG attack with anyone else since you have unlimited ammo and better weapons.
There's no reason to bother interrogating the terrorists after battle. Be sure to heal your members after every battle that they take damage. Use the PARA command to check their HP and the つかう ("Use") くすり ("Medicine") command to heal. If a member dies, you might as well reset since they can't be revived and you're gonna need them.
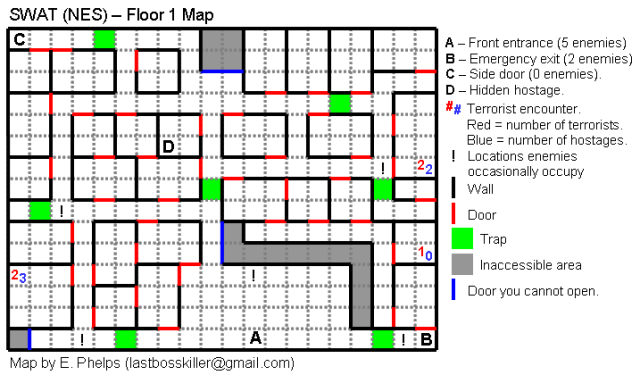
Using the above map, find and defeat the stationary terrorists that are indicated by the red and blue numbers, who are often guarding hostages. Also defeat the other terrorists that are moving around the map. The "!" symbols above are locations where I encountered terrorists, but may not work for you, so you'll really have to go around and check the whole floor thoroughly multiply times to make sure you find every terrorist who might be moving around the map.
You can find a hidden hostage at location "D" above, which is just for bonus points basically and doesn't serve a serious purpose.
Occasionally, check to see if you've defeated all the terrorists by using the commands つかう ("Use") and つうしんき ("Communications Device"). Continue hunting for terrorists until the game lets you move on to the next level or you're convinced the glitch has occurred that makes the computer think there are more terrorists when there are not and use the password provided for the next floor to proceed.
Note also that it is possible to get stuck in an infinitely looping battle when fighting the enemy located at the "!" symbol in the lower-left portion of the screen. I'm not convinced that it's truly infinite (because after all, how could you test that?), but a Japanese website said it is, and I ran out of patience after too many battles to test it any longer. Similar situations on later floors are not infinite, but require 6 or extra repeated battles for you to get out of the loop.
Floor 2
Password:
ささんらさぬいきいさわさえまてけかな
むめむんらみへせのたふせのけせそへ
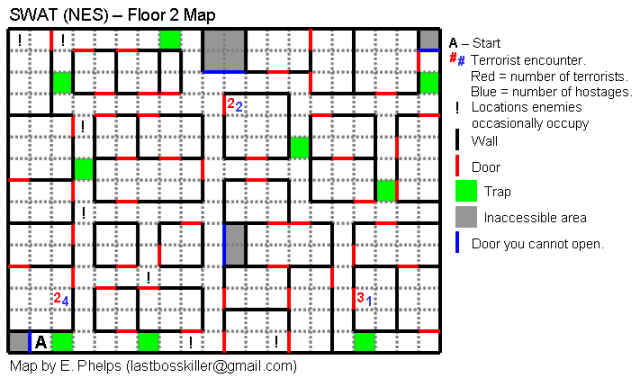
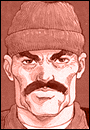
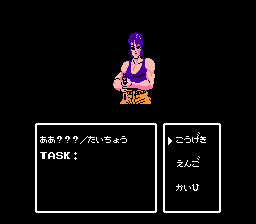
This floor is essentially the same as the previous one. There is a special enemy of note at the bottom-middle part of the map who looks like the guy pictured to the right. Often, after defeating these guys they will immediately attack you again, like it's another glitch in the game where you are about to get stuck in an infinite loop of battles. But I've found that defeating these guys several times (maybe 6 times or so) will finally make the battle loop end. Aside from the first floor, I never got stuck in a truly infinite battle.
Floor 3
Password:
ゆとか!そちとゆさやらひぬらきろきの
さのかつほすぬゆらゆよもめひつねし
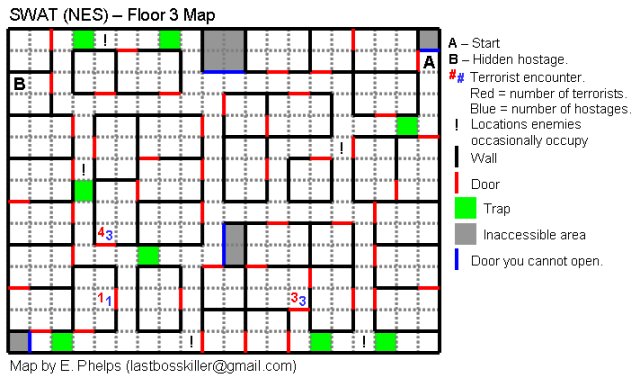
Note, there is a hidden hostage on this floor, but nothing else worthy of note. Except I guess for a four enemy battle, but you should be able to handle it just fine. Make sure you are healed up before engaging in the battle.
Floor 4
Password:
ちすてわかせなななうほほい!いとわた
てすくのよへにれほにけくしそはくさ
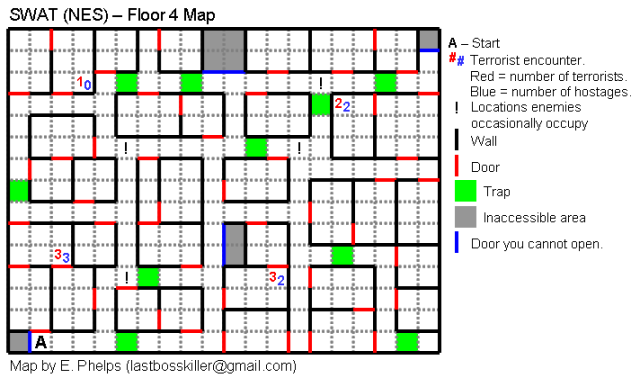
Another straightforward floor with nothing new worthy of note.
Floor 5
Password:
れてとま!そちとかひそんとねさそらて
ふひしゆなのちみこそひすぬゆらやみ
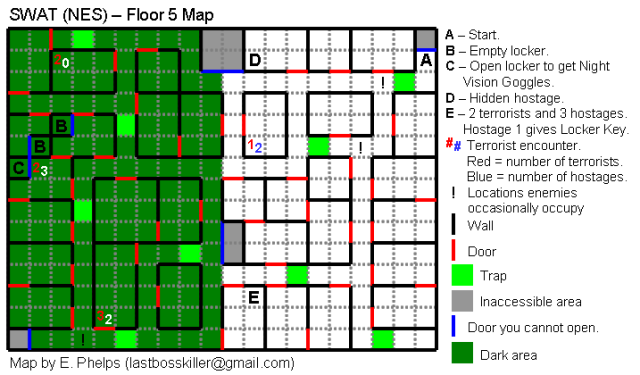
The enemies seem like they get a lot harder to hit at this point in the game. But continue using the strategies that I mentioned previously. Namely, aim for arms, distribute your SMG fire, and be patient (don't go using weird menu options).
This floor is the first floor with a dark area, where it's a little harder to see. It doesn't really affect anything. But you can get a Locker Key (ろっかーのかぎ) from hostage 1 in the area I marked "E". Use the key to open the locker at location "C" to get the Night Vision Goggles (あんしきょう). Use them to see in the dark.
Floor 6
Password:
るとき!そらさぬいねいわわきえててぬ
けとむむろやゆみへたへたふせのけく
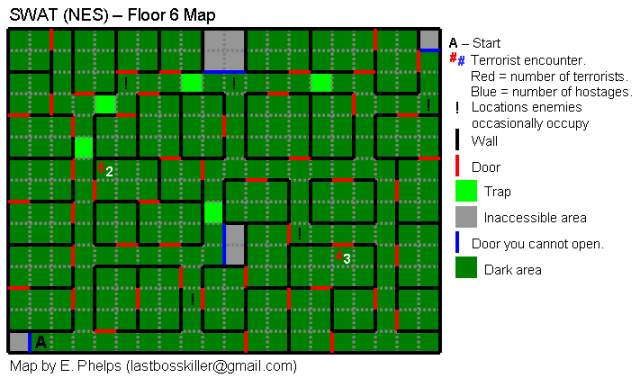
More dark area, but nothing new to note.
Floor 7
Password:
のとるせこちとか!なちわゆ!んんさま
ぬせぬたみせはとすむすはよりよゆま
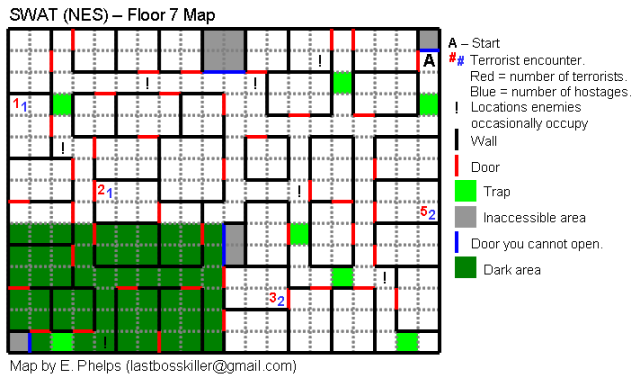
This map has a five enemy battle. No special strategies for it, just run in guns blazing with full health.
Floor 8
Password:
るとき!もらさぬらねいえわ!えかてに
けのむりろやゆみへたへたふせのさく

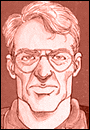
Floor 8 is pretty challenging, so I'm actually going to put a lot of detail into this section. You have multiple difficult battles to prepare for. I'll explain them each since it took me several tries and I learned them well. I would recommend saving the right half of the map for last since that's where the worst enemies are found. Scour the left side real quick and take out some easy terrorists. You'll find one very annoying guy here:

I really hate this guy. He's so freaking hard to hit. But you just have to keep aiming for his arm and after a very long time, you should eventually take him out. Usually, it requires Lionel getting what seems to be some sort of "critical hit" or something very unlikely, but it usually happens eventually. You can use one of Max's sleep bomb attacks if you're desperate, although there's no guarantee he'll hit either. Make sure you heal afterwards.
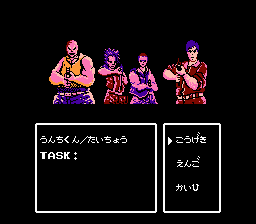
Toward the middle of the map, or maybe on the right side since they move around, you will come across this pesky 3 enemy group:
They are all hard to hit, and even when you do hit them, it seems you do very little damage. So I will recommend focusing on taking one out at a time. Aim all three of your SMGs on the short guy on the left until you take him out since he is the most hit-able. Have Lionel aim at the middle guy since he can get lucky and take him out in one turn sometimes. After taking out the left guy, focus your fire on the middle guy, then eventually the right guy. The right guy is much harder to hit for some reason. You're basically waiting to get a critical hit in order to damage him. I did manage to take him out once with the command せっきん -> しのびより -> KF -> うで, so give that a try sometimes if you're having bad luck. Make sure you heal after the battle!
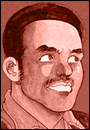
In the upper-right area of the map is an encounter with four stationary enemies:
I had some trouble with these guys at first, but they're not so bad. Have Harris aim at the second guy (with the spiky hair) and he should be able to take him out in one turn by himself. Max may be able to take out the fourth guy in one shot by himself, so have him aim there. Your character can deal decent damage to the third character, so have him aim there. Have Sakata and Lionel aim for the guy on the left, who seems a bit harder to hit.
There is a whopping six enemy battle on the right side of the map:
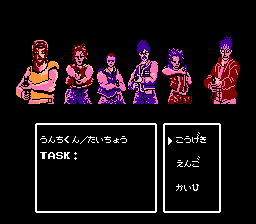
Luckily, these are all easy enemies. Your character should be able to take out enemy 1 in one turn. Harris should take out enemy 2 in one turn. Sakata should be able to take out enemy 3 in one turn. Max can take out enemy 4 in one shot. Lionel can aim at one of the other two, but enemy 5 is easily killed by your character, and enemy 6 is easily killed by Harris, so it should only take two turns. I keep saying "killed", but you're just disabling them I guess.
The hardest battle on the map is with these four guys:
They appear in the same room as the 6 enemy battle (by the South door), or in the Eastern-most corridor. I found that, if you engage in battle with them in the same room as the 6 enemy battle, they will have their backs to you, which gives a noticeable boost to your hit percent, so engage them there if you can. The two guys on the right side will damage you for ~50 HP per hit, and they each shoot 4 times per turn. So you really want to take out one or both of them in the first turn if possible. Problem is, that's not necessarily easy. So here's my advice: Ignore enemy 1 for now, who deals less damage to you, but is hard to hit so you can't really take him out quickly. Have Harris use the SMG on enemy 2 and he's basically guaranteed to take him out in the first turn. Your main character has trouble hitting enemy 4, so aim at enemy 3 with the SMG. Have Sakata aim at enemy 4 with the SMG. It will be huge if Lionel can take out enemy 3 or 4 with his rifle. I find he hits enemy 3 with the most accuracy, so have him aim there. Finally, have Max use the Sleep Bomb (さいみん). If enemies 3 and/or 4 remain after the first round, concentrate all of your firepower toward finishing them off, unloading all your Sleep Bombs if need be. If you make it out of this fight with all of your SWAT member alive, then heal up and you're pretty much home free. If any died, then I hope you saved this battle for last-ish so you don't need them all anymore.
Ending and Credits (**Spoiler Warning!**)
Since you may not have the patience to see the ending yourself with all the glitches, I will show you the end here. This isn't really a spoiler since there's not much of anything to spoil. It's simply a summary screen of some stats:
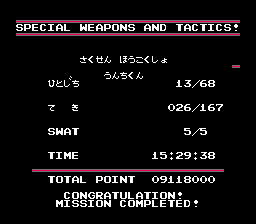
You can see how many hostages you rescued out of a possible 68, how many enemies you killed out of a possible 167, and how many of your SWAT team members survived.
You can also see how much time you had left to finish the game.
Interestingly, there is a "Total Point" stat that we haven't heard anything about while playing the game. I assume it is just based on the four stats listed above it.
It's strange to note that my total enemy killed number was 26 according to this screen. Obviously, you have to kill all the enemies to make it here, so apparently starting from your password erases all of your hostage rescues and enemy kills up until that point. So there's not much point in caring about this stats since they're not carried along in your password.
On this screen, you can press "A" to see the staff credits. For those of you who care, I will list the credits as the game shows them:
Executive Producer
Miki Hiro
Shuich Sato
Producer
Tadao Okubo
Game Designer
Yosihiko Takeda
Programmer
Masahiro Yoshihara
Yasuhide Sakakura
Descriptive Programmer
Kenichi Suzuki
Makoto Higa
Naomi Sato
Character Designer
Hajime Oki
Music
Takashi Tushimi
Kimio Nomura